The following is my small note for setup WordPress using docker on Synology 6.1. At here I will break into 3 parts: mysql docker, wordpress docker and config reverse proxy
Before we install anything, we created some folder using FileStation for storing docker data. in this example, we create following folders
docker/web-mysql
docker/web-mysql/data
docker/web-wordpress/
Install Docker Container:
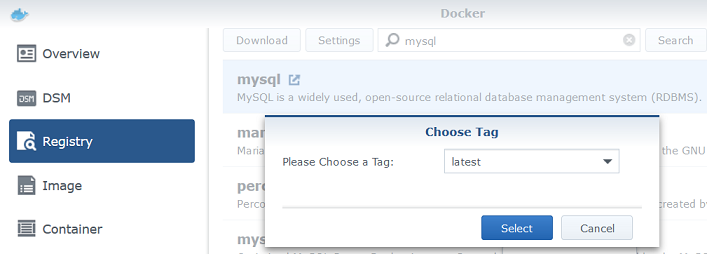
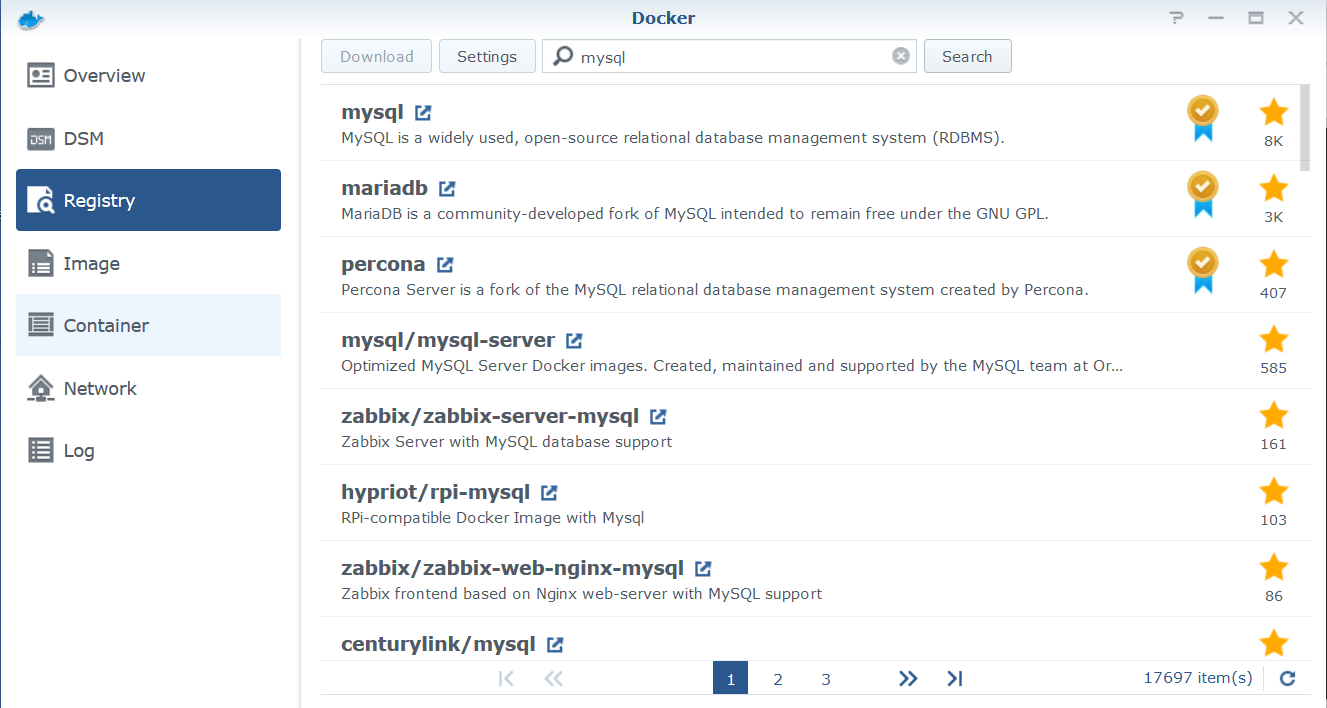
Go to registry to download require docker. At here we download mysql and wordpress. at here, we download mysql first

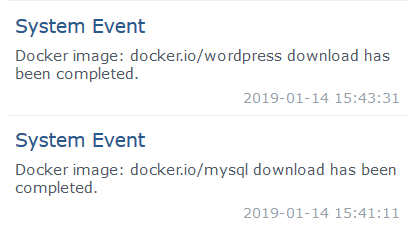
Repeat above step to download wordpress. and wait the download complete message pop-up in System Event screen like follow

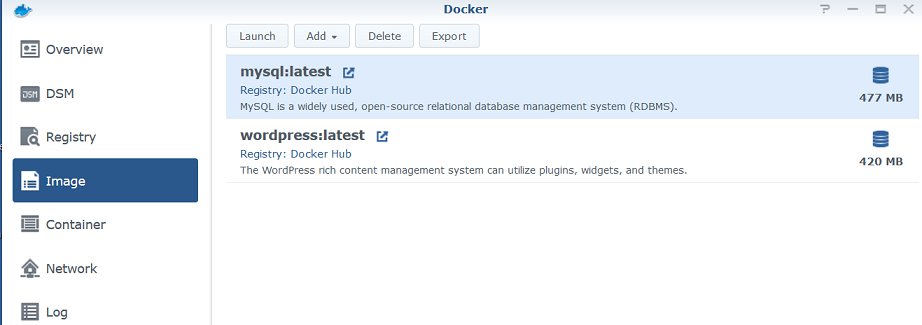
Once download finished, at Image tag should look like as follow
Highlight “mysql:latest”, click “Launch” to create mysql container

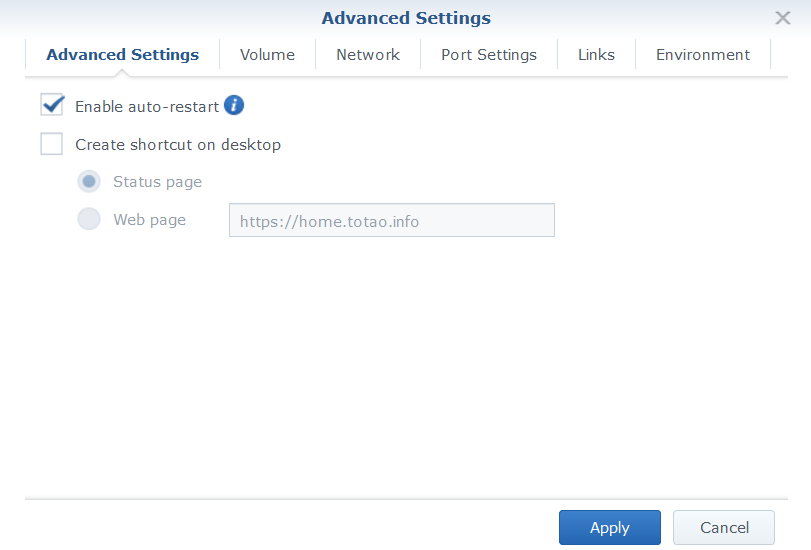
We setup some docker parameter by click “Advanced Setting” button
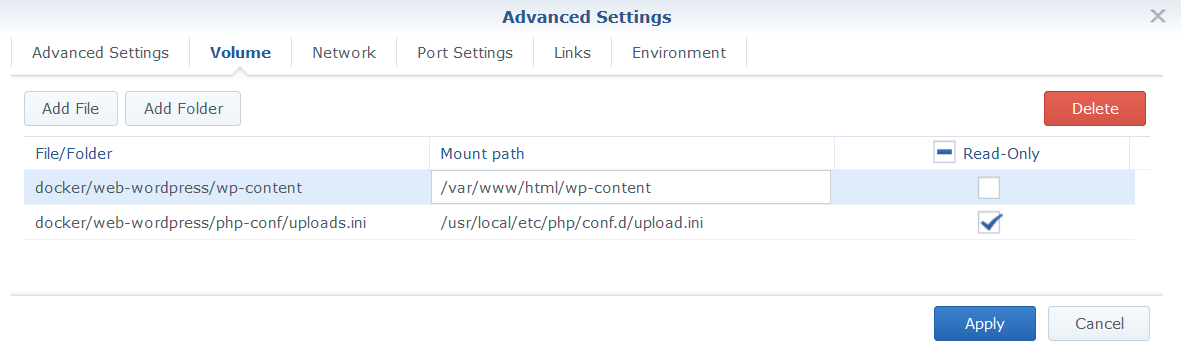
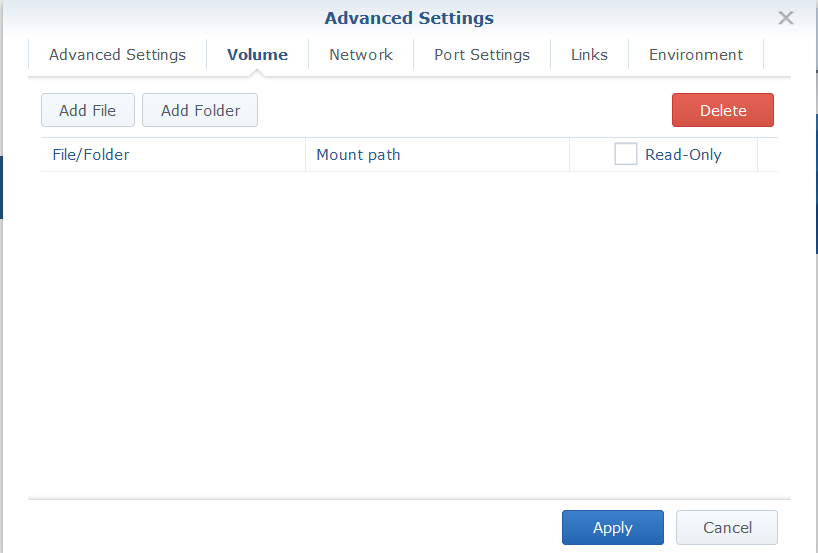
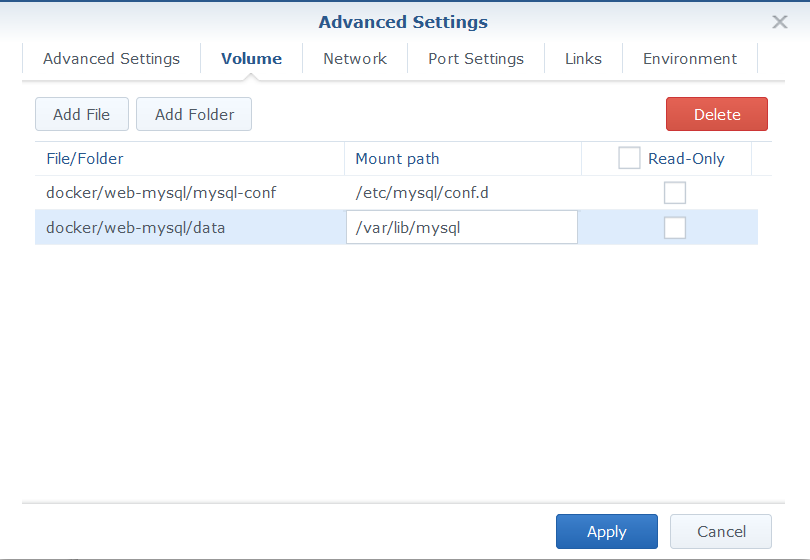
At Volume tag, click “Add Folder”


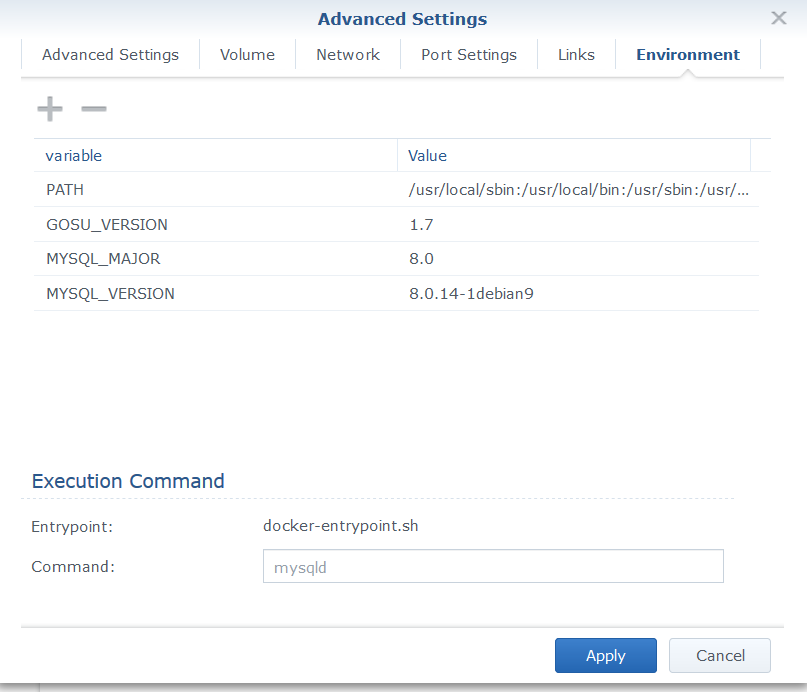
At Environment tag screen as follow
Click “+” to add
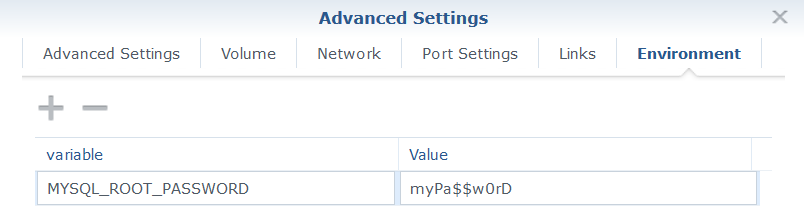
At here, we define the mysql root password, example as here is myPa$$w0rD
Click apply then go to summary screen
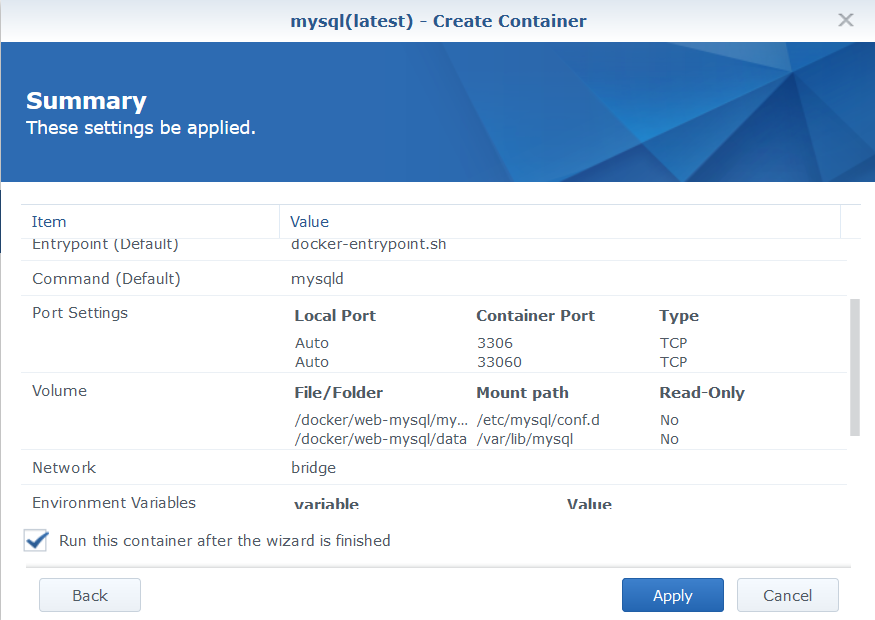
Confirm all value is ok, then click apply
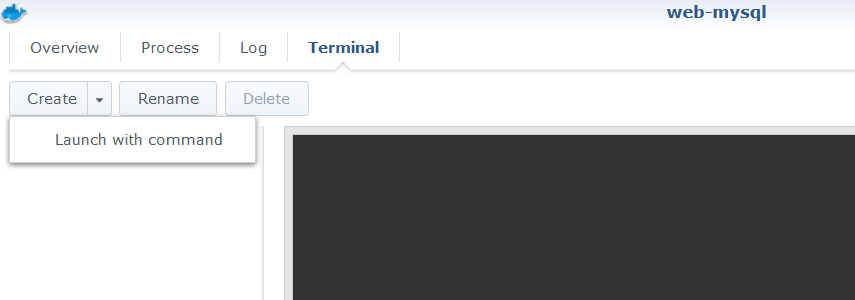
Next, we need to login to this container and create wordpress database
Double click the container
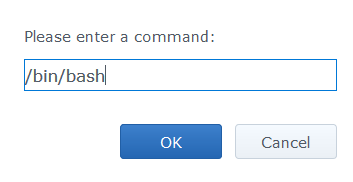
Click “Terminal”, create, “Launch with Command”


# create user ‘wpdbuser’@’%’ identified with mysql_native_password by ‘myDBpassword’;
** start from MySQL 8.0, we need to have the keyword “mysql_native_password”
![]()
![]()
Since it is mysql 8.0, wordpress will cannot connect to mysql database if using this old method. therefore we need to modify as follow
ALTER USER ‘username’ IDENTIFIED WITH mysql_native_password BY ‘wPdbpassW0rd’;

|
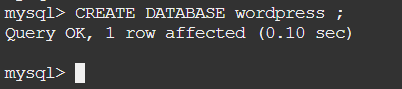
Copyright (c) 2000, 2019, Oracle and/or its affiliates. All rights reserved. Oracle is a registered trademark of Oracle Corporation and/or its affiliates. Other names may be trademarks of their respective owners. Type ‘help;’ or ‘\h’ for help. Type ‘\c’ to clear the current input statement. mysql> mysql> CREATE DATABASE wordpress ; Query OK, 1 row affected (0.10 sec) mysql> mysql> mysql> CREATE USER ‘wpadmin’@’localhost’ IDENTIFIED BY ‘mYwpAdmin’ ; Query OK, 0 rows affected (0.12 sec) mysql> mysql> GRANT ALL PRIVILEGES ON wordpress.* to ‘wpadmin’@’localhost’; Query OK, 0 rows affected (0.11 sec) mysql> FLUSH PRIVILEGES; Query OK, 0 rows affected (0.04 sec) |
#############################################3
Create WordPress docker
Click “Advanced Setting”

Add following Environment Variable
WORDPRESS_DB_USER
WORDPRESS_DB_PASSWORD
WORDPRESS_DB_NAME
Extra: WP API 1.1
https://api.wordpress.org/secret-key/1.1/salt/
WORDPRESS_AUTH_KEY
WORDPRESS_SECURE_AUTH_KEY
WORDPRESS_LOGGED_IN_KEY
WORDPRESS_NONCE_KEY
WORDPRESS_AUTH_SALT
WORDPRESS_SECURE_AUTH_SALT
WORDPRESS_LOGGED_IN_SALT
WORDPRESS_NONCE_SALT
WORDPRESS_CONFIG_EXTRA define(‘FS_METHOD’, ‘direct’);
REF: https://hub.docker.com/_/wordpress/

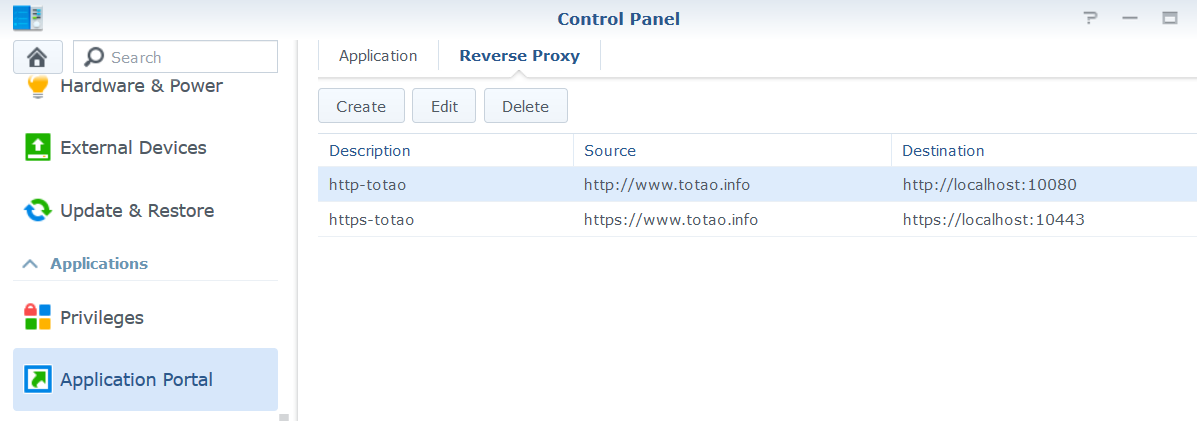
Config Reverse Proxy at Control Panel
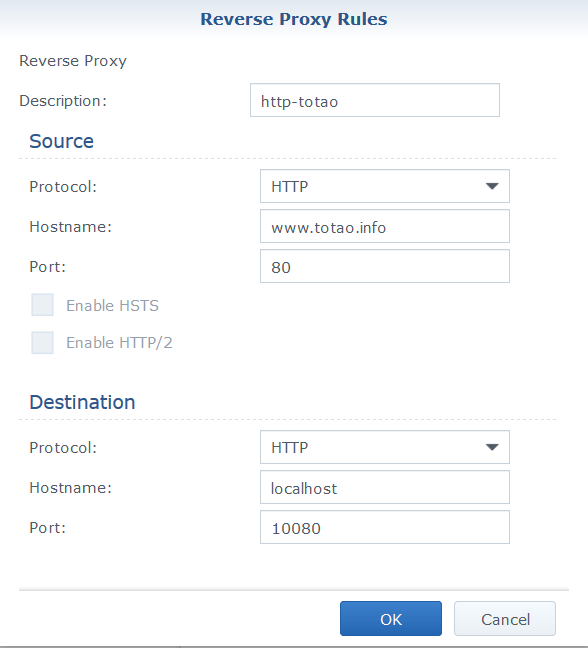
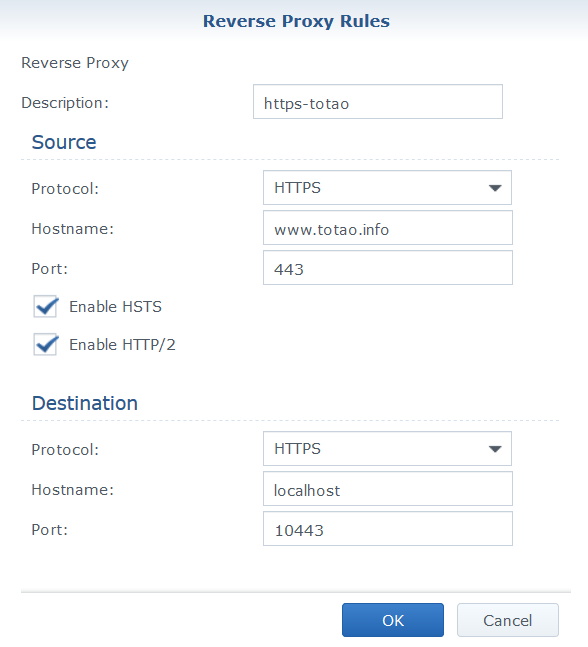
And result as follow
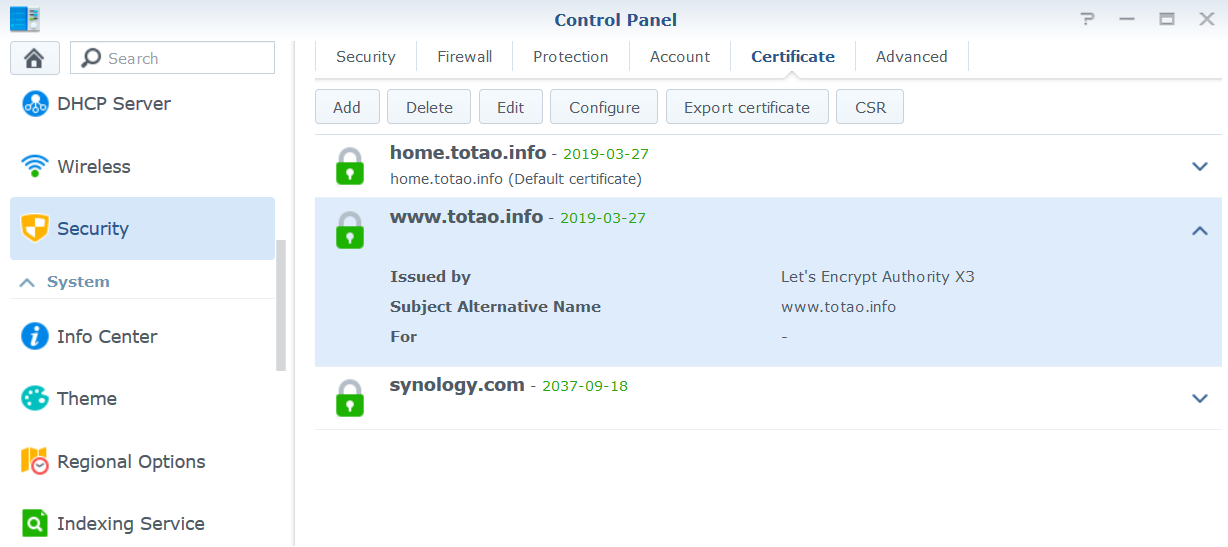
Generate Key
Open container
Open browser
http://www.totao.info/wp-admin/install.php
Add following line at bottom of wp-config.php
Extra security:
https://www.wpbeginner.com/wordpress-security/
general docker setup step
https://densitylabs.io/blog/benefits-of-wordpress-and-docker-in-a-production-environment
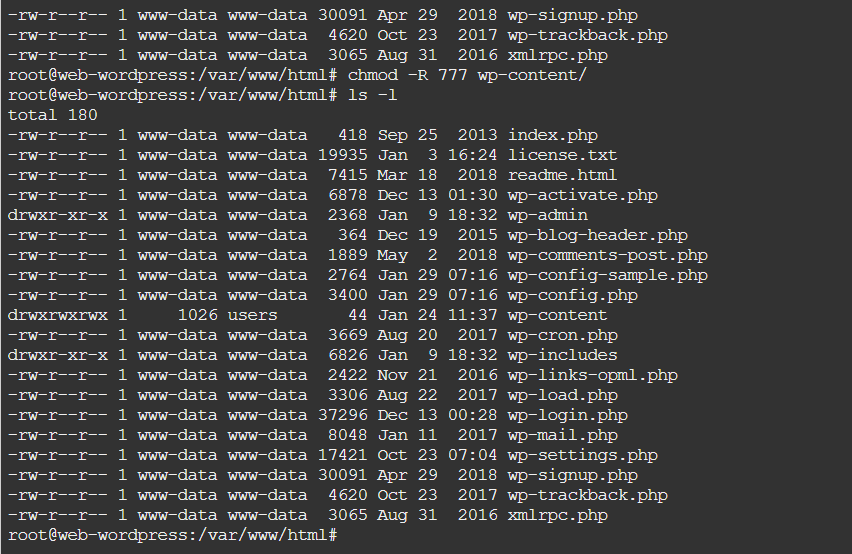
Problem solve
- Grant permission on wp-content
Go to registry to download the require docker, we need mysql and wordpress.
At here we download mysql first. Type mysql and click search button
Highlight mysql and the click download button

Click select then it will start download
Repeat the same step for docker wordpress
Check the System event message,
One finish, at image tag, should have following item

Highlight mysql, click launch, will pop-up following windows
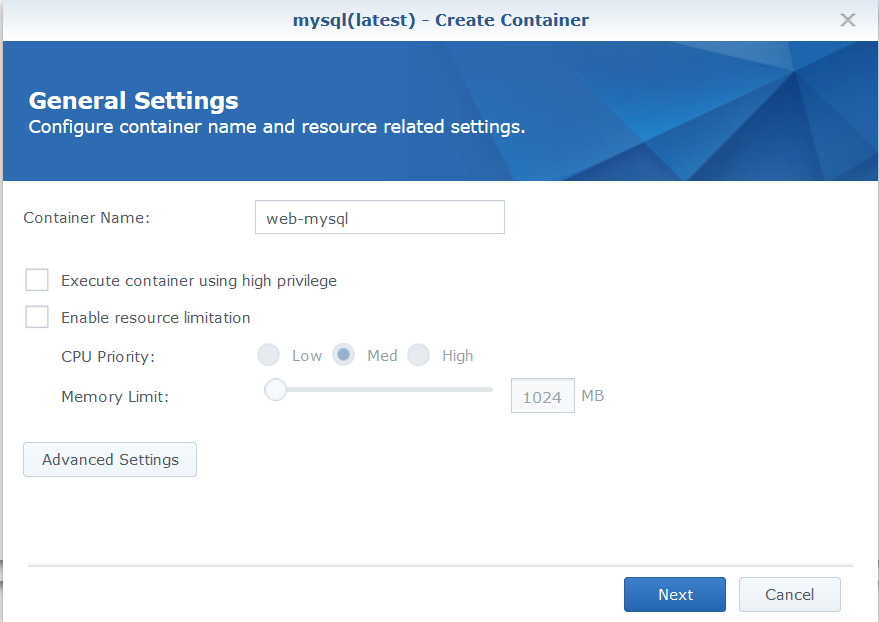
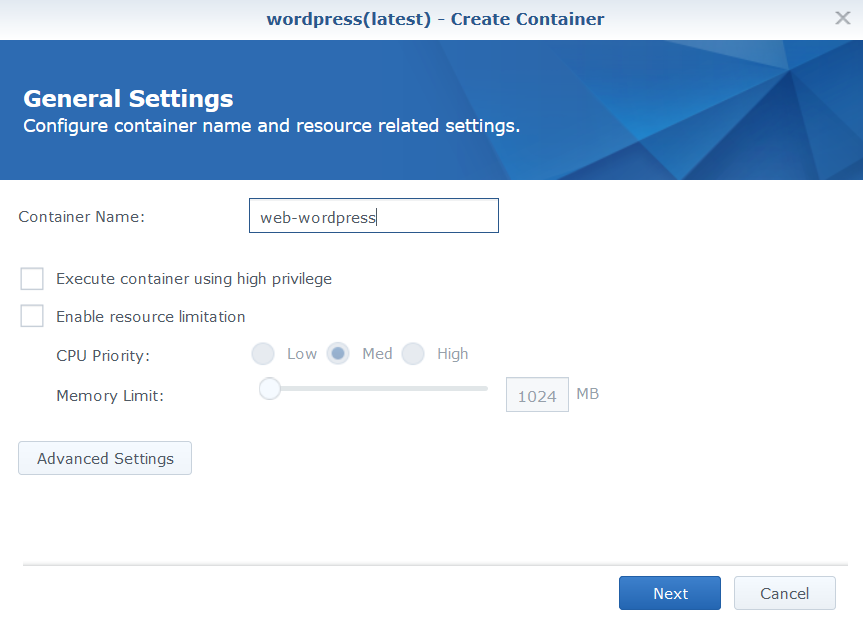
Give a name for this container
Then click “Advanced Setting”, we enable auto-restart

At Volume tag, click “Add Folder”
At Environment tag screen as follow

Click “+” to add

PATH:
/usr/local/sbin:/usr/local/bin:/usr/sbin:/usr/bin/:/sbin:/bin
MYSQL_ROOT_PASSWORD mYsqlAdmin
Click apply then go to summary screen

Confirm all value is ok, then click apply
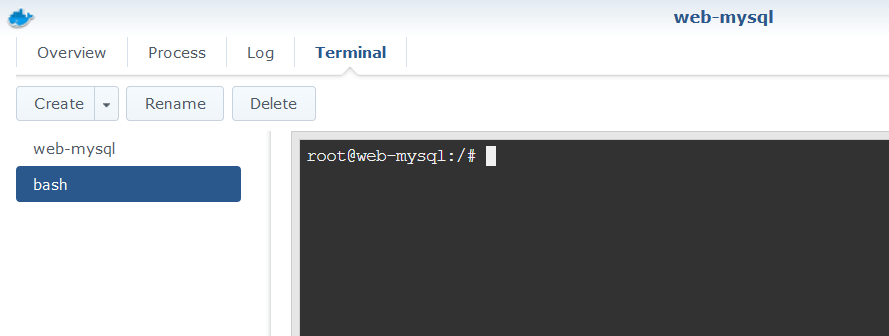
Next, we need to login to this container and create wordpress database
Double click the container

Click “Terminal”, create, “Launch with Command”
![]()
![]()
** start from MySQL 8.0
ALTER USER ‘username’ IDENTIFIED WITH mysql_native_password BY ‘password’;

This should be end of mysql part